On a grey November afternoon, when the outdoor garden has settled in for winter, there’s something especially satisfying about planting something green.
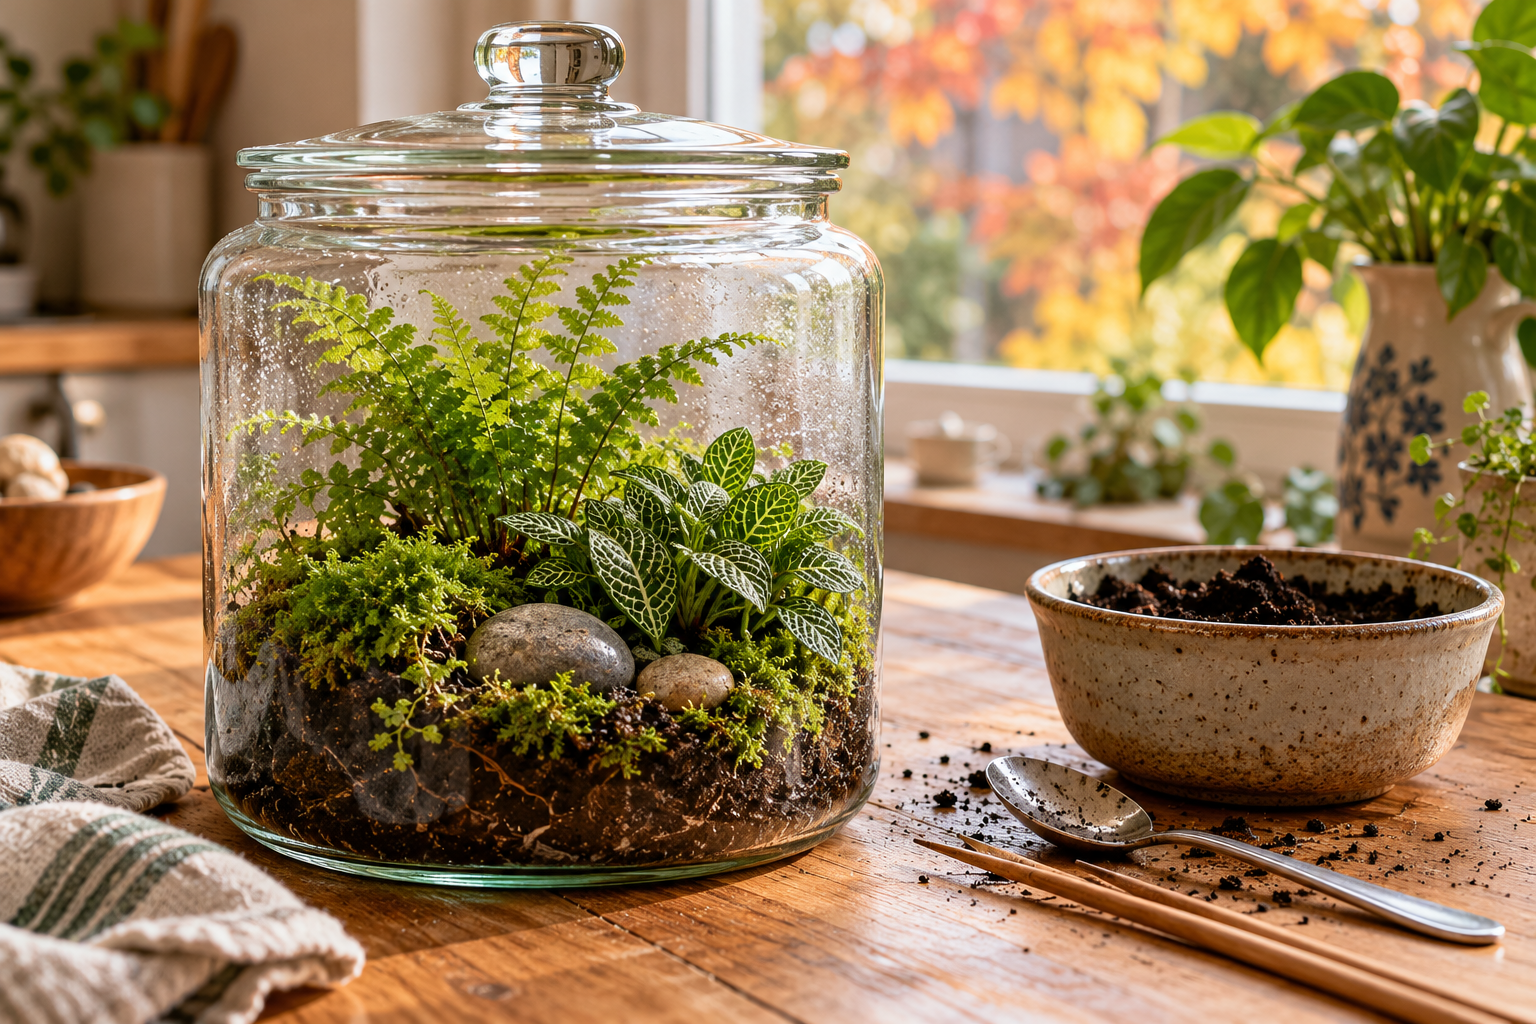
You don’t need much: a glass jar, a little potting mix and two or three small plants. Clear a spot at the kitchen table and spend an hour putting them together. Before long, a small landscape takes shape—a fern at the back, moss below it and a patterned leaf beside a smooth stone.
That’s the appeal of a terrarium. You’re creating a garden you can look into, tend and watch change, even when there’s snow outside. A little curiosity and a willingness to pay attention will take you a long way.
A tiny garden with its own water cycle
A terrarium is a miniature garden grown inside a transparent container. Some are open; others have lids that hold moisture around the plants.
In a closed terrarium, moisture evaporates from the soil and is released through leaves, collects on the glass, then returns to the growing medium. Once conditions are balanced, it may go for months without needing more water.
That humid environment suits many small tropical plants that can struggle with the dry air in a heated home. Think of it as a tiny greenhouse. The pleasure comes from arranging the whole scene, then watching the plants grow into it.
Why it’s such a satisfying hobby after 50
Terrarium gardening fits comfortably into all kinds of homes and routines. You can work sitting at a table, keep your supplies in a small box and display the finished garden on a shelf or coffee table.
If you enjoy gardening but would welcome a break from hauling soil or kneeling in flower beds, that’s a considerable advantage.
There’s plenty of room to make it your own: a woodland scene, a collection of tropical foliage or a landscape that reminds you of a favourite trip. And there’s no pressure to make anything useful. Spending an afternoon making something you enjoy looking at is reason enough.
Open or closed? Let the plants decide
A closed terrarium retains moisture and suits small plants that enjoy humidity, including fittonias, suitable miniature ferns and mosses.
An open terrarium allows more airflow and dries out faster. Succulents and cacti need drier conditions, appropriate growing media and very careful watering in containers without drainage holes. For a first succulent project, a pot with drainage holes is more forgiving.
For this project, we’re making a closed terrarium. Watching moisture circulate adds another layer of interest, and care can be light once you get the balance right.
Choose one growing environment. Desert plants and humidity-loving tropical plants won’t be happy together in a sealed jar.
Your supplies checklist
Choose a clear jar with a lid and an opening wide enough to work through comfortably. A biscuit jar or large storage jar is ideal. Narrow-necked bottles look beautiful, but planting through them can test anyone’s patience.
- One clean, clear glass jar with a lid
- Two or three small plants suited to humid conditions
- Fresh indoor potting mix
- A small spoon and long tweezers or chopsticks
- A spray bottle or another way to add small amounts of water
- A soft brush or cloth for cleaning the glass
- Optional: horticultural activated charcoal, clean decorative stones and suitable cultivated living moss
Keep the first project inexpensive. You don’t need a specialist kit—a spoon and chopsticks work remarkably well.
Good plants for your first jar
Look for plants that stay relatively small, grow slowly and enjoy similar light and moisture conditions. These are useful starting points:
- Fittonia, or nerve plant: distinctive white, pink or red leaf veins bring colour without flowers. It enjoys humid conditions.
- Miniature ferns: delicate foliage gives a planting the feel of a tiny woodland. Check the variety’s mature size before buying.
- Suitable compact peperomias: some offer interesting leaf shapes and textures. Ask which varieties suit a closed, humid container.
- Cultivated moss: a suitable variety can soften the surface and connect the planting visually.
Tell the garden centre staff you’re making a closed terrarium. If pets or young grandchildren might reach it, check the safety of each plant before buying.
Let’s build your miniature garden
Set everything out before you begin. This is an enjoyable, slightly messy kitchen-table project, so a tray or washable surface comes in handy.
1. Start with a clean jar
Wash the container with warm, soapy water, rinse thoroughly and let it dry. Check your plants for pests, damaged foliage and signs of disease. A warm, humid jar can give problems a comfortable place to develop, so start with healthy plants and clean materials.
2. Add the potting mix
Put enough slightly damp mix into the jar to accommodate the roots. If you’re using horticultural activated charcoal, mix in a little at this stage. Shape the surface into a gentle slope if you’d like to give the scene some depth.
You may have seen instructions calling for a thick gravel layer beneath the soil. Penn State Extension explains that gravel isn’t necessary to improve drainage in a closed terrarium. Your jar has no drainage holes, so careful watering matters much more than a layer of stones.
3. Try the arrangement
Set the plants beside the jar and consider how they’ll look together. If you’ll mainly view the garden from one side, place the tallest plant toward the back and smaller plants forward. Vary the leaf shapes and textures.
Leave some open space. It may be tempting to fill the jar immediately, but the plants need growing room. A little space makes the arrangement easier to appreciate, too.
4. Plant your landscape
Make small planting holes, then gently remove each plant from its pot. Loosen tightly packed roots if needed and settle the plant into position.
Use your spoon or chopsticks to move mix around the roots. Firm it gently without packing it hard, and keep leaves clear of the glass where possible. Take your time; working inside a jar can be fiddly.
5. Add a few finishing touches
A patch of moss, two smooth stones or a short pebble path can make the scene feel complete. A fern arching over a stone may be all you need to suggest a woodland clearing.
Brush stray soil from the leaves and wipe the glass where you can reach it. You can always add another detail later.
6. Water lightly and choose a spot
If the mix needs more moisture, add a small amount of water. Aim for lightly moist soil, with no pooling at the bottom. A spray bottle gives you control, though moisture needs to reach the growing medium.
Let wet foliage dry before putting on the lid. Choose bright, indirect light and avoid strong direct sun: a closed glass container can heat up quickly and damage plants.
Now comes the interesting part—watching the garden settle in.
Read the glass, then check the soil
During the first few days, check regularly. Some condensation is normal; it may appear and clear as temperatures change. If the glass stays heavily coated with droplets, remove the lid temporarily to let moisture escape.
If the soil is drying and plants are wilting, a little water may be needed. Check the soil first; wilting alone doesn’t tell you enough. Finding the moisture balance can take a few adjustments, so resist watering on a fixed schedule.
- Remove fallen or decaying leaves.
- Watch for mould or unhealthy growth.
- Trim plants when they begin crowding their neighbours.
- Keep an eye on light and moisture as the seasons change.
Low maintenance still leaves room for a little attention. A quick look every few days is more useful than automatically reaching for the watering can.
Three ways to make it your own
The miniature forest
Combine a suitable small fern, fittonia and cultivated moss. Add a few smooth stones and leave some open ground. Keep it simple so the foliage carries the scene.
The holiday memory
Choose tropical foliage and stones that suggest a place you’ve enjoyed visiting. You don’t need to reproduce it exactly; a leaf shape or the way the plants sit together may bring the memory back. A small photograph beside the jar completes the display.
The terrarium afternoon for two
Invite your partner or a friend to make one alongside you. Share materials, choose separate containers and see how differently the arrangements turn out. Compare their progress over the following months—your rainy-afternoon project becomes an ongoing conversation.
Your four-week terrarium challenge
Take a photograph when you finish, then one each week for a month from roughly the same position. You’ll notice changes that are easy to miss from day to day.
If a plant struggles, make an adjustment and keep watching. Replacing a plant or revising the arrangement is part of gardening, including gardening under glass.
- Week 1: Photograph your finished jar and watch the moisture settle.
- Week 2: Compare the leaves and check whether condensation clears during the day.
- Week 3: Look for new growth and remove any decaying leaves.
- Week 4: Compare all four photographs. What changed? What would you try differently?
Would a workshop help?
If you’d like guidance choosing plants or judging moisture, look for workshops at botanical gardens, garden centres and community organizations. Check current program calendars for upcoming sessions.
Learning alongside other people gives you a chance to ask questions as you work—and meet others who enjoy plants and creative projects.
Five mistakes you can easily avoid
- Too much water: a closed jar won’t need your ordinary houseplant watering routine.
- Too much sun: choose bright, indirect light and watch where sunlight falls as seasons change.
- Too many plants: leave growing room from the beginning.
- Different plant needs: choose varieties that agree on humidity, moisture and light.
- Leaving decay inside: remove unhealthy foliage promptly and investigate persistent mould.
One small step for today
Find a clear jar with a lid and a comfortable opening. Set it where you can see it, then make a short list of plants to ask about at the garden centre. That’s enough to get started.
What would you enjoy creating: a tiny forest, a reminder of a favourite holiday or something entirely your own?
A small garden worth making time for
A few weeks after planting, you might pass the jar on your way to make coffee and notice a new fern frond. You stop, look more closely and see that the moss has spread a little, too.
It’s a modest pleasure: something living to care for, something you made with your own hands and something that rewards a closer look.
When the outdoor garden is resting, a terrarium is a welcome way to stay connected to growing things. Begin with an empty jar and a few small plants—and see where your curiosity takes you.